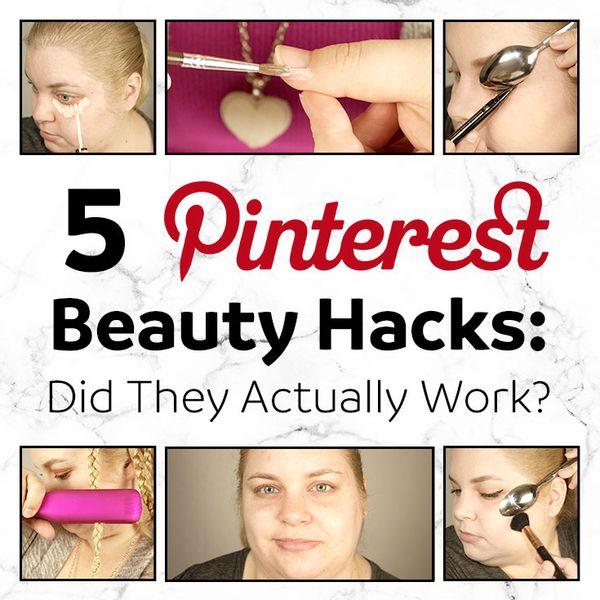
Pinterest is a great tool for finding new recipes, quotes, life hacks, cleaning tips and more. There is a wealth of information on nearly any topic, making it a helpful resource, but it can sometimes be a big time waster.
I especially love to browse tips and tricks for making my life easier. Some of the tips are very creative, and others seem like a complicated version of something you’re trying to simplify. I decided to test out a few beauty tips to see if they actually work. Here’s what I discovered:
Get waves by using a straightener on braids
Tip: Braid your hair. Press your straightener down the length of the braids to make waves.
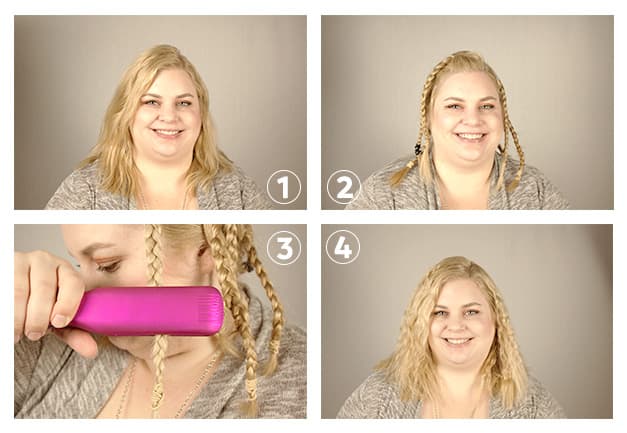
My experience: I have thick, coarse hair, so I figured this tip wouldn’t work for me at all but I still wanted to try. I usually have to do my hair in layers whenever I straighten or curl it. To err on the side of caution, I decided to do two layers of braids for a total of eight. Once I finished braiding, I pressed my straightener down the length of the braid for a few seconds, like I was crimping it. I did this to each braid twice to make sure the heat was evenly dispersed. It took me about five minutes or so to do this. Then I waited a few minutes for them to cool before unbraiding. This did create waves in my hair, but they were different than I expected. If I did this again, I’d do bigger braids to get more loose waves. The straight ends of my hair would probably blend in better as well.
Rating: 4 out of 5
Hide dark under-eye circles with lipstick
Tip: Use an eyeshadow brush to apply lipstick under your eyes before foundation or concealer. For fair or light skin, look for a red with pink undertones. For medium skin, look for a red with purple undertones. For dark skin, look for a coral with red undertones. Start with a light layer of lipstick, and apply concealer or foundation over it with a brush or sponge. Set with a powder.
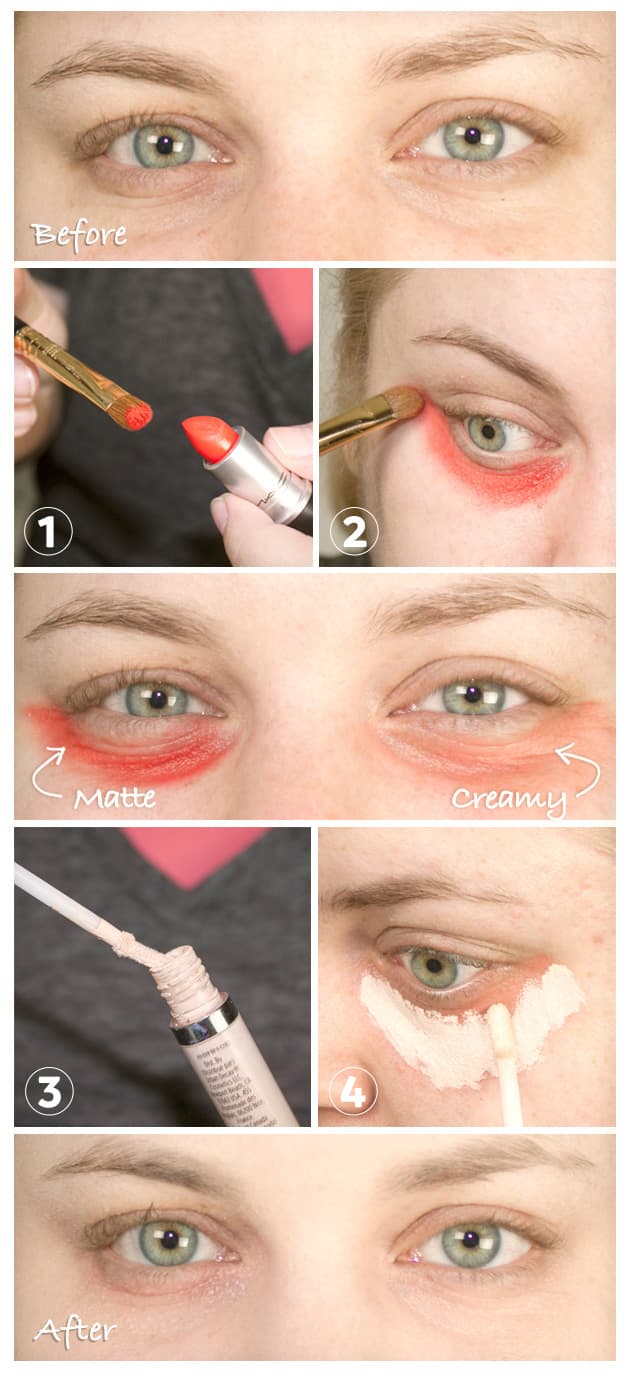
My experience: Putting lipstick on my face didn’t seem like a great idea, and I worried about irritating my face. I tried out two different lipsticks because I wasn’t sure which shade would be better for me since I’m so pale. One lipstick was a matte orange/coral, and the other was a creamy peach. The matte formula was harder to blend, and it seemed to irritate my eye area more than the creamy formula did. I worried about my undereye area feeling too heavy and cakey from using layers of product. It wasn’t too bad, but using a lightweight concealer with a lot of coverage definitely helped. With the darker lipstick, I had to apply two light layers of concealer. With the lighter layer, I applied one layer. A color-correcting concealer may work better on its own and be less irritating for your skin. Be mindful with the products you’re using. Some brands are likely safer than others for use around the eye area. I can’t in good conscience recommend this tip for daily use, but it does work.
Rating: 4 out of 5
Get winged eyeliner with a spoon
Tip: Use the handle of the spoon to get a straight wing. Use the rounded part to create the curved tip and fill in the wing.
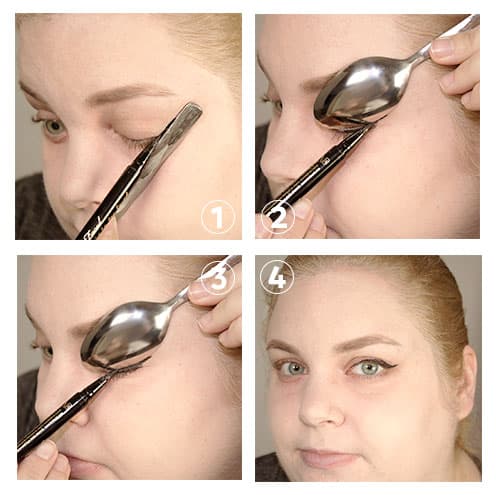
My experience: I love using liquid eyeliners, but I almost never do winged liner. It takes a lot of concentration, and I almost always mess up. When I tested this, I had plenty of makeup wipes ready because I assumed this would be a giant fail, but it turned out much better than I thought it would. It felt awkward trying to get the spoon at the right angle and to get the liner to cooperate. It worked, but it was a slow process because I didn’t want to mess up. Filling in the wing was the most difficult part for me, but that was likely user error. It was hard to get the same angle and length on my other eye, but, again, that could be more user error than anything else. I think this could be helpful if you need help with your winged liner. I used a felt-tip liner, but you could also use a pencil or liquid liner if you’re more comfortable with those.
Rating: 5 out of 5
Contour with a spoon
Tip: Place the rounded part of a spoon over the apples of your cheeks. Apply bronzer or contour powder below the spoon. Blend out any harsh lines.
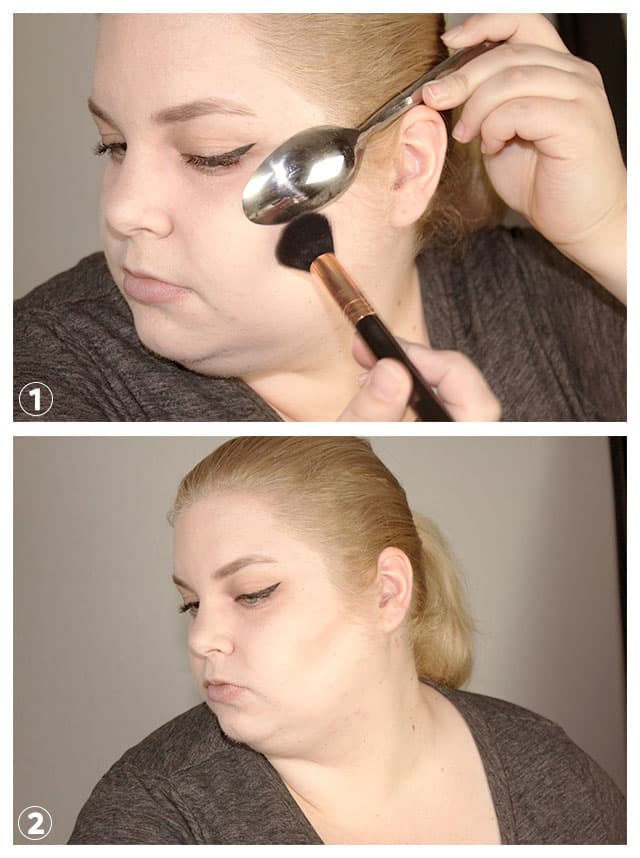
My experience: I thought this tip would give me a quick, easy and sharp contour, and I was partly right. The spoon helps you find your cheek bones, making it easy to put the bronzer or contour powder in the right area. This is good for beginners or people who have trouble with contouring, but it may be more work than necessary for others. Once I placed the powder below the spoon, it took me a long time to blend it out and make sure the line wasn’t too harsh. I used some face powder on top to try to blend it more, but even that didn’t really help. Use less powder than you think you need, and prepare to blend, blend, blend.
Rating: 3 out of 5
Avoid getting polish on your fingers with glue
Tip: Dip a small paintbrush in Elmer’s glue, and paint it around all around your nail in an oval shape. Get as close to the nail as possible without getting it on the nail. Let the glue dry for a few minutes until it is transparent and no longer tacky. Paint your nails as usual, and let the polish dry. Peel the glue off.
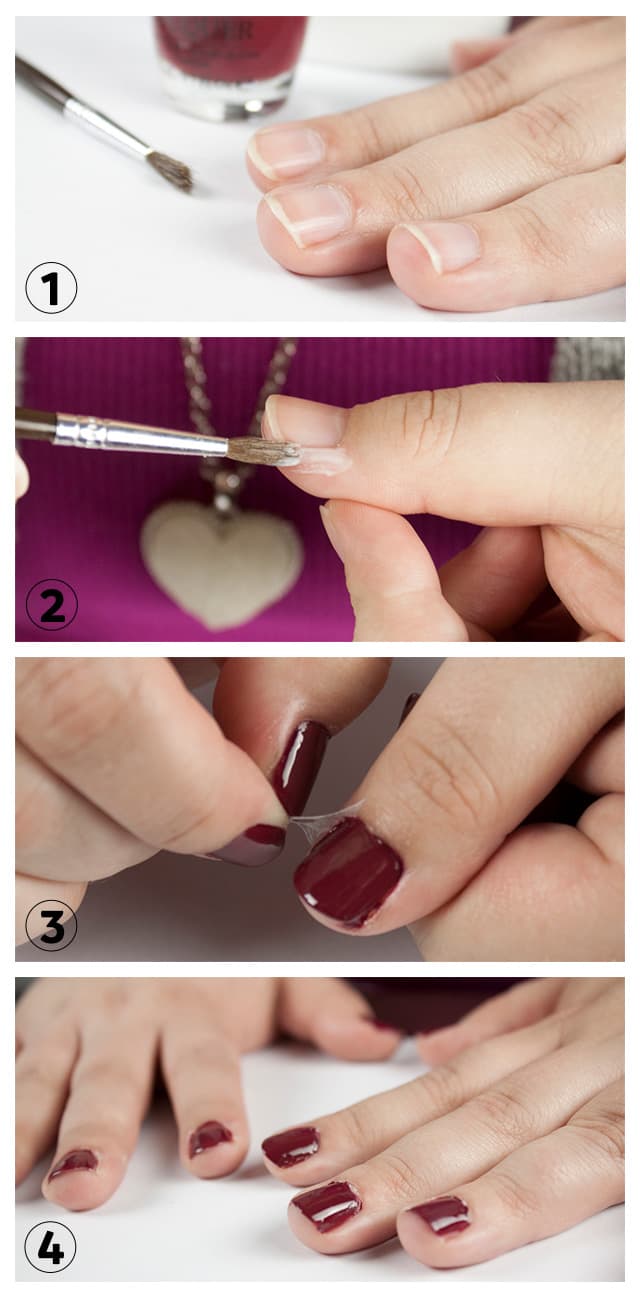
My experience: I thought this sounded tedious when I first saw it. Despite of my years of practice, I’m still terrible at not getting nail polish on my fingers. I usually use nail polish remover and a Q-tip to clean up, so I hoped this route would be faster and easier. Painting your fingers with glue is pretty relaxing, and peeling off the glue was just fun. I didn’t get as close to my nail as I would’ve liked for some of my fingers, but overall it looked good once I peeled off the glue. I was surprised by how fun and simple this was, and I’d definitely do this again. It didn’t take as long to apply and dry as I thought. Next time I’ll be more careful and precise with the application. Also, use more glue than you think you need to paint around your nail. The wider the strip, the easier it is to peel it off all at once.
Rating: 5 out of 5
Sources:
brit.co
xovain.com
makeup.com
Have you tried any of these Pinterest tips, or would you in the future?